

Instagram can be one of the most powerful patient acquisition tools for your dental practice — but only if you treat it as part of a structured marketing system, not a place to post the occasional photo and hope something sticks.
You’re probably already using Instagram. Most clinics are.
The problem is that very few use it strategically.
The real difference between an Instagram account that just looks busy and one that actually drives bookings comes down to clarity:
clarity in what you’re saying, clarity in how you guide patients, and clarity in what happens after someone engages with your content.
This guide shows you exactly how to use Instagram for your dental clinic — not to chase likes or followers, but to create predictable, repeatable growth that supports real patient bookings.
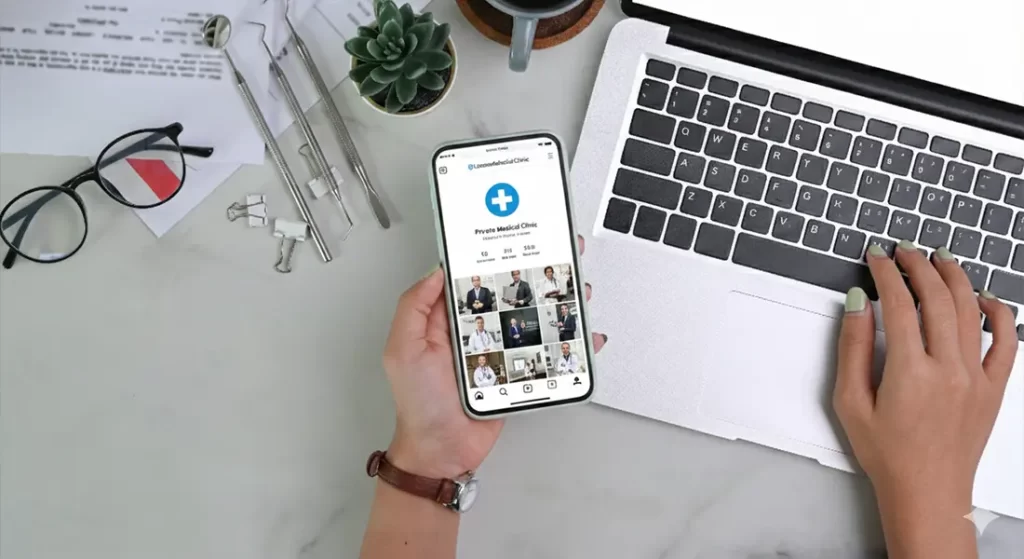
How to Set Up Your Dental Instagram Account Properly
Before you post any content, your Instagram account needs to be set up correctly. If the foundations are wrong, even good content will underperform.
Most dental clinics rush into posting without fixing their profile, links, and structure first. The result is avoidable friction: patients land on your account, feel unsure what you offer, don’t understand what to do next, and leave.
This setup process is not about aesthetics or branding. It’s about removing uncertainty and making it easy for the right patients to take the next step.
The steps below walk you through how to set up your Instagram account so that every post you publish works harder to support enquiries and bookings, rather than just filling your feed.
Step 1: Choose the Right Instagram Handle for Your Dental Clinic
Your Instagram handle should start with your clinic name wherever possible. This is the foundation of your account and one of the hardest things to change later, so it needs to be right from the start.
Patients search for clinics by name, not by marketing terms. If your handle doesn’t match what patients already know or have heard, you introduce unnecessary friction before they’ve even engaged with your content.
If your exact clinic name is available, use it. Do not add extra words unless you have to.
If your clinic name on its own is already taken, add one clear modifier after the name — and only one.
The best modifiers to use are:
- your location, if it’s short and widely recognised, or
- the word “dental” or “dentist”
Choose whichever keeps the handle simplest and easiest to remember.
Avoid adding multiple modifiers, random numbers, abbreviations, or anything that makes the handle harder to type or guess. If a patient hears your clinic name and searches for it, they should find your account immediately without trying several variations.
As a rule:
clinic name first
one modifier only if necessary
clarity over creativity
Once your handle is set, you should not need to change it again. Getting this right at the start keeps your Instagram presence consistent with your website, Google profile, and everything else patients see.
Step 2: Switch Your Account to a Professional Business Account
Before you do anything else, make sure your Instagram account is set up as a Professional Business account. This is not optional if you want Instagram to support enquiries and bookings.
Go to your profile, open Settings and privacy, select Account type and tools, and switch to a Business account.
Once you do this, Instagram unlocks features you will rely on later, including account insights, contact buttons, and advertising options. Without these, you will not be able to see which posts perform well, add clear ways for patients to contact you, or promote content if you decide to use paid support.
It also allows you to connect your Instagram account properly to Facebook and Meta’s ad platform. Even if you don’t plan to run ads immediately, setting this up early avoids technical issues later.
Make sure this is done before you publish any content. Switching account types after you’ve already started posting can reset some settings and create unnecessary admin work. Getting this right at the start keeps everything clean and avoids friction as your account grows.
Step 3: Choose the Correct Account Category
When you switch to a Business account, Instagram will ask you to choose an account category. This category appears on your profile and helps patients immediately understand what type of clinic you are.
Instagram categories are selected from a searchable list, and availability can vary slightly by region and over time. In most UK-based dental accounts, the following categories are typically available:
- Dentist
- Dental Clinic
- Cosmetic Dentist
- Orthodontist
You should choose the category that most accurately reflects what you actually do day to day, not what sounds most impressive.
If you are a single clinician-led practice, Dentist is usually the most appropriate and safest option.
If you are a multi-dentist or branded practice, Dental Clinic is often clearer for patients.
Only choose Cosmetic Dentist or Orthodontist if that genuinely represents your primary clinical focus and appears as an option in your account.
If a more specific category is not available, do not force a loosely related alternative. Choosing Dentist or Dental Clinic will not harm visibility. Category selection is about patient clarity, not optimisation tricks.
Once selected, leave your category unchanged. Consistency matters more than experimentation, and a clear, accurate category helps reinforce trust when patients land on your profile.
Step 4: Optimise the Name Field for Search
The Name field on your Instagram profile is searchable and plays a key role in how patients find you inside the app. This is not the place for slogans or branding language.
Use this field to clearly describe who you are and where you are based, in a way patients would naturally search.
A simple format works best:
- [Clinic Name] – Dentist in [Area]
- Dental Clinic in [Area]
Choose a location patients actually recognise, such as a city or well-known area, rather than a postcode or obscure neighbourhood.
Keep the wording natural and easy to read. Do not try to list treatments or cram in multiple terms. One clear description is enough.
Once set, keep the Name field consistent. Changing it frequently adds no benefit and can confuse patients who return to your profile.
This small detail makes it easier for the right patients to find you and understand what you do the moment they land on your account.
Step 5: Write a Bio That Explains Your Clinic Clearly
Your Instagram bio is often the first piece of text a potential patient reads. Its role is simple: to help someone understand who you are, what you offer, and what they should do next.
Avoid slogans, brand statements, or vague claims. Patients are not looking for marketing language here — they want clarity.
A strong dental clinic bio should communicate four things, in plain English:
- what type of clinic you are
- where you are based
- what you mainly help patients with
- what the next step is
Below are clear, consistent examples.
Example 1: Cosmetic dental clinic
Cosmetic dental clinic in Manchester
Smile makeovers & cosmetic dentistry
Clear advice and realistic outcomes
Book a consultation ↓
Example 2: Dental implants clinic
Dental implants clinic in Leeds
Implants & full-arch solutions
Experienced surgical team
Book your consultation ↓
Example 3: Orthodontic clinic
Orthodontic clinic in Brighton
Braces & Invisalign for teens and adults
Specialist-led orthodontic care
Book an orthodontic assessment ↓
Keep each line short and readable. A patient should understand your clinic in a few seconds without scrolling or guessing.
Avoid listing every treatment you offer. Focus on what you want to be known for and leave the detail for your posts and website.
Your final line should always make the next step clear, whether that is booking a consultation, learning more, or starting the process.
Once your bio is written, keep it consistent. Small refinements are fine, but constant changes rarely improve results and often create confusion.
Step 6: Add Your Contact Details in the Correct Places on Your Profile

Your contact details should not be buried in captions or left for patients to hunt for. Instagram gives you specific places to add them properly, and you should use those, not work around them.
Go to Edit profile and open Contact options. This is where your core contact details should live.
Add your clinic phone number here so it appears as a call button on your profile. This keeps it visible, tappable, and consistent with how patients expect to contact a dental clinic.
If your clinic uses WhatsApp for enquiries, enable WhatsApp within the same Contact options section. This creates a direct message button that many patients prefer to use, especially for initial enquiries.
Add your main enquiry email address here as well. This ensures patients who don’t want to call or message can still contact you easily.
Do not place contact details only in your bio text. The bio should explain who you are and what you do, not replace proper contact buttons. Instagram’s built-in contact options exist for a reason — use them.
Once added, check your profile as if you were a patient. Your phone, WhatsApp, and email buttons should be immediately visible without scrolling or guessing.
This keeps your profile clean, professional, and easy to act on.
Step 7: Use Story Highlights to Answer Key Patient Questions
Story Highlights are one of the most overlooked parts of a dental Instagram profile. Used properly, they help patients understand your clinic without needing to scroll through dozens of posts.
Think of Highlights as a simple way to organise the information patients are already looking for when they visit your profile.
You don’t need many. In fact, fewer is better.
Start by choosing Highlights that answer the most common patient questions, such as:
- how booking works
- what consultations involve
- what treatments you focus on
- what patients say about you
Each Highlight should have a clear purpose. If you can’t explain what a Highlight is for in one sentence, you probably don’t need it.
Use short video clips or simple slides that explain things clearly. These don’t need to be polished or heavily edited. Clear, calm explanations work far better than promotional graphics.
Avoid overloading your profile with too many Highlights. A small set that actually helps patients decide is far more effective than a long row that nobody clicks through.
Once your Highlights are set up, review them every few months to make sure they still reflect how your clinic operates. They should support your enquiries, not create confusion.
When used properly, Story Highlights quietly do a lot of the heavy lifting — answering questions, reducing hesitation, and making it easier for patients to take the next step.
Step 8: Pin the Right Posts So New Visitors Get Context Immediately
When someone lands on your Instagram profile, they rarely start at the beginning of your feed. They see whatever happens to be at the top — unless you guide them.
Pinned posts let you control that first impression.
You should use pinned posts to answer the questions a new visitor is silently asking before they decide whether to follow you, message you, or click through to your website.
Aim to pin three posts, each with a clear job.
The first pinned post should explain who you are and who you help. This might be a short video from the lead dentist or a simple post that sets expectations about your clinic, your approach, and the types of patients you typically see.
The second pinned post should explain how the process works. This is where you briefly walk through what happens if someone gets in touch — consultation, assessment, next steps. The goal is to remove uncertainty, not to sell.
The third pinned post should focus on your main area of work. Choose the treatment or service you most want to be known for and explain it clearly. This isn’t about showing results alone; it’s about helping patients understand whether it’s right for them.
Avoid pinning promotional posts, offers, or time-sensitive content. Pinned posts should stay relevant for months, not weeks.
Once your pinned posts are set, review them occasionally to make sure they still reflect how your clinic operates. If your focus changes, update them — but don’t rotate them constantly.
Pinned posts act as quiet signposts. Used well, they save patients time, set expectations early, and make your profile feel considered rather than random.
Types of Instagram Content Dental Clinics Should Use

Once your account is set up properly, your focus should be on posting content that answers real patient questions and helps people feel confident about contacting you.
You don’t need lots of formats or constant new ideas. A small number of content types, used consistently, works best.
1. Dentist-Led Treatment Explanations
This is the most important type of content you can post on Instagram.
Dentist-led treatment explanations are short, clear explanations from a clinician about the treatments you offer, delivered in the same calm, practical way you already speak to patients in clinic.
The goal isn’t to sell. It’s to help patients understand whether a treatment might be right for them before they ever get in touch.
Use this content to explain:
- who a treatment is and isn’t suitable for
- how the process works from consultation to completion
- the questions and concerns patients commonly raise
- alternative options patients should be aware of
Keep each post focused on one idea only. One treatment, one question, or one decision point at a time. Trying to explain everything in a single post usually leads to confusion.
These explanations work best when they feel conversational rather than scripted. Speak directly to the camera or use simple visuals, as if you were answering a question in a consultation.
You don’t need perfect lighting or heavy editing. Clarity and credibility matter far more than polish. Patients are more likely to trust content that feels real and informative than content that feels promotional.
When used consistently, dentist-led explanations help pre-qualify patients, reduce repetitive questions in clinic, and make enquiries feel more informed from the outset
2. Results and Case Example Content (Use Selectively)
Before-and-after images and outcome examples can be useful on Instagram when used sparingly and responsibly.
They work best as supporting content, not as the main focus of your account.
When you share results, always add context. Explain:
- who the treatment was suitable for
- what was involved
- what patients should realistically expect
Avoid presenting results as guarantees or dramatic transformations. Overly polished visuals, exaggerated language, or implied promises can undermine trust — and they can also create problems later if you decide to run ads.
If results content appears unrealistic, misleading, or promise-led, it increases the risk of ads being rejected or ad activity being restricted when you move into paid promotion. This is especially true if posts imply guaranteed outcomes or life-changing transformations.
For this reason, results content should complement your dentist-led explanations, not replace them. Most patients decide to enquire because they understand the process and feel reassured — not because they’ve seen a perfect outcome in isolation.
3. Clinic and Team Content
Clinic and team content helps patients understand what it actually feels like to visit you. For many people, uncertainty and anxiety are bigger barriers than cost or treatment itself, and this type of content quietly removes that friction.
Use this content to show:
- your clinic environment
- the people patients will meet
- how your team works together day to day
This does not need to be staged, scripted, or heavily edited. Simple, informal clips often work best because they feel genuine and approachable.
Short videos walking through the clinic, quick introductions to team members, or casual behind-the-scenes moments all help patients build familiarity before they ever step through the door.
Avoid turning this into a promotional exercise. The aim isn’t to impress, it’s to reassure. Patients are looking to answer the question, “Will I feel comfortable here?”
Used consistently, clinic and team content reduces first-visit anxiety and makes enquiries feel less intimidating.
4. Reviews and Social Proof

Reviews and testimonials help reinforce the messages you’re already sharing about your care, approach, and patient experience.
Rather than posting reviews in isolation, use them to support explanations you’ve already given. For example, if you’ve explained how consultations work, a review that mentions feeling listened to or reassured adds credibility.
Text-based reviews, short quotes, or simple screenshots work well. They don’t need to be heavily designed or edited.
Avoid exaggerated claims or cherry-picked extremes. The most effective reviews are calm, specific, and believable.
You can also use reviews to address common concerns indirectly. A patient comment about feeling relaxed, understanding their options, or having things clearly explained often reassures future patients more than any marketing copy.
When used thoughtfully, reviews act as quiet confirmation that your clinic delivers the experience you describe.
Formats to Use Across All Content Types
Formats are simply different ways of presenting the same information. They don’t change the message — they just change how patients consume it.
The key is to choose the format that best suits what you’re trying to explain, rather than forcing content into a format because it feels trendy.
Talking-to-camera videos work best when you want to explain something calmly and clearly. These are ideal for treatment explanations, addressing common concerns, or walking through what a consultation involves. They don’t need to be scripted or heavily edited — clarity and confidence matter more than polish.
Carousels are useful when information benefits from being broken down step by step. They work well for explaining processes, answering common questions, or comparing options in a simple, swipeable format. One clear idea per slide is enough.
Stories are suited to more informal, time-sensitive content. They’re a good place to share day-to-day moments, clinic updates, quick explanations, or reminders. Stories help maintain visibility without needing everything to live permanently on your feed.
Simple static posts still have a role, particularly for reviews, short explanations, or clear statements that don’t require motion. These work best when the message is concise and easy to read.
You don’t need to use every format all the time. Most clinics do best by choosing one or two primary formats and using the others as support.
If the message is clear, the format will work. If the message isn’t clear, no format will fix it.
How to Film Content for Your Dental Instagram

Filming Instagram content doesn’t require a studio, a script, or professional equipment. What matters most is that patients can see you clearly, hear you properly, and understand what you’re saying.
Keep the Setup Simple
A modern smartphone is more than enough. Film vertically, using the rear camera if possible, as it offers better quality. Place the phone at eye level so the video feels natural rather than forced.
You don’t need a tripod if you don’t have one, but keeping the camera steady makes a noticeable difference. A basic phone stand or even a stable surface works fine.
Choose a Quiet, Well-Lit Space
Film somewhere quiet where you won’t be interrupted. Natural light works best, so standing near a window is ideal. If you’re indoors with artificial lighting, make sure your face is evenly lit and not shadowed.
Avoid filming with a bright window or light source behind you, as this makes you appear dark on camera.
Speak as You Would in Clinic
There’s no need to memorise a script. Think of the video as answering one patient question. Keep it conversational and calm, and focus on one idea per video.
If you make a mistake, pause and start again. You can trim clips easily later if needed.
Keep Videos Short and Focused
Most effective videos are between 30 and 60 seconds. Shorter is fine if the message is clear. Don’t try to explain everything at once — one clear explanation is enough.
Don’t Overthink Perfection
Patients are not expecting polished marketing videos. They want to see a real clinician explaining things clearly. Slight imperfections often make content feel more genuine and approachable.
Batch Filming Saves Time
If possible, film several videos in one session. Answer a few common questions back-to-back while you’re already set up. This makes content creation much easier to maintain.
Review Before Posting
Before posting, quickly watch the video back. Check that the sound is clear, the lighting is acceptable, and the message makes sense. You don’t need to edit heavily — just make sure it’s understandable.
How to Schedule Your Instagram Posts (Daily Posting Done Properly)

Posting daily works well for dental clinics when the content is structured and repeatable. The aim isn’t to be creative every day or post for the sake of it — it’s to stay visible, familiar, and consistent.
A simple rhythm removes guesswork and makes daily posting sustainable, even during busy clinic weeks.
A Simple Daily Instagram Schedule for Dental Clinics
| Day | Content Type | Purpose |
| Monday | Dentist-led treatment explanation | Educate patients on treatments, suitability, or common concerns |
| Tuesday | Myth-busting or clarification content | Address common misunderstandings |
| Wednesday | Clinic or team content | Build familiarity and trust |
| Thursday | Dentist-led treatment explanation | Reinforce education with a different topic or angle |
| Friday | Review or social proof | Reinforce credibility |
| Saturday | Results or case example (with context) | Support understanding with real outcomes |
| Sunday | — | Day off |
This structure keeps your feed balanced without inventing unnecessary categories or overloading your audience.
How to Use This Schedule in Practice
You don’t need new ideas every week. Most clinics reuse the same structure and simply rotate topics. Monday and Thursday can always be dentist-led explanations, just focused on different treatments or common questions.
If daily posting feels heavy at first, you can follow the same structure but post every other day. Once batching and scheduling are in place, moving to daily posting becomes much easier.
Batch and Schedule Ahead
Daily posting only works if you batch content. Film several videos in one session and schedule them across the week. This keeps Instagram from becoming a daily task and prevents long gaps when the clinic gets busy.
Recommended Scheduling Tools
You don’t need complex software to schedule posts. Any of the following tools are commonly used by clinics and work well for Instagram:
- Meta Business Suite – Free and directly integrated with Instagram and Facebook. Suitable if you’re only posting to Meta platforms.
- Metricool – Popular with clinics managing multiple platforms. Allows scheduling, basic analytics, and planning in one place.
- Later – Useful for visual planning and scheduling posts in advance, particularly if you want to preview your feed layout.
- Hootsuite – More feature-heavy, better suited to larger teams or clinics managing several accounts.
Choose one tool and stick with it. The goal is consistency, not switching platforms.
Focus on Consistency, Not Polish
You don’t need everything to be perfect. Posting clear, helpful content consistently is far more effective than waiting to share something highly polished once in a while. Patients respond to familiarity and clarity, and with scheduling in place, Instagram can run smoothly without becoming a daily task.
Getting Started with Instagram Ads
Instagram ads aren’t something you switch on casually. They sit on top of your existing Instagram presence and work best when your account already looks credible, consistent, and clear.
Before running any ads, it’s important to understand that Instagram offers multiple advertising options, each designed to do different things. Choosing the wrong type of ad is one of the most common reasons clinics see poor results or assume Instagram advertising doesn’t work.
Getting started isn’t about spending money quickly. It’s about understanding what ad formats are available, how they behave, and what they are realistically capable of delivering. Once that’s clear, ads become a controlled extension of your wider marketing, rather than a gamble.
The sections below break down the main Instagram ad options, what each one does, and how clinics typically use them in practice.
The Different Types of Instagram Adverts
Instagram gives you several different ways to advertise, and while many of them look similar to users, they work very differently behind the scenes. Knowing what each option actually does helps you avoid wasting time or budget.
Boosted Posts
Boosted posts are posts you’ve already published on Instagram that you pay to show to more people. You boost them directly from the Instagram app.
This option gives you limited control. You can choose a location, basic demographics, and a broad goal such as profile visits or website clicks, but you don’t get detailed targeting or proper testing options.
Boosted posts are best used when you want to extend the reach of content that already performs well organically. They’re not designed for structured campaigns or consistent enquiry generation.
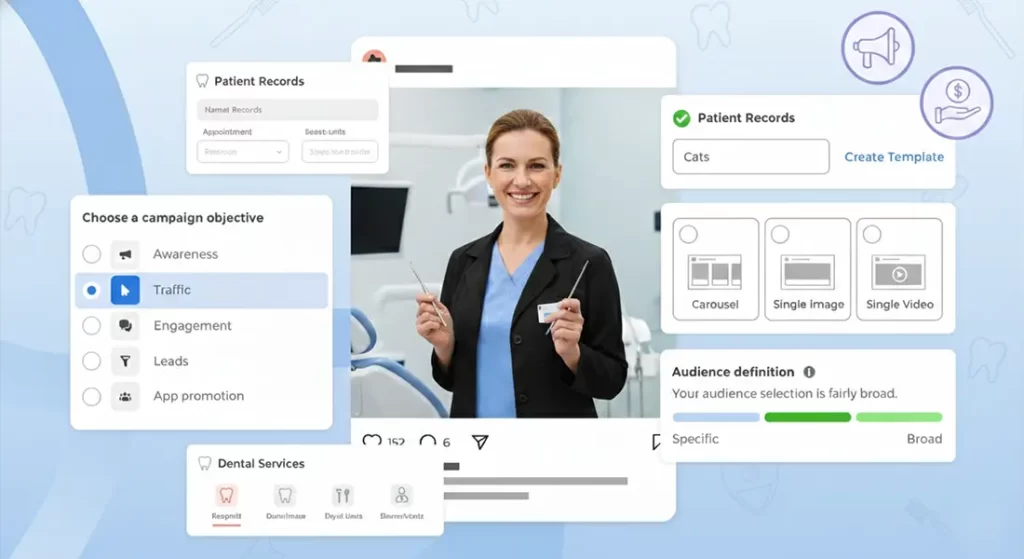
Feed Adverts (via Meta Ads Manager)
Feed adverts are created through Meta Ads Manager rather than the Instagram app. They appear in users’ feeds like normal posts, but give you far more control over how everything is set up.
With feed adverts, you can:
- choose specific campaign objectives
- define your targeting in detail
- test different versions of the same advert
- see clearer performance data
If you’re planning to run ads in a more deliberate, repeatable way, this is usually the format you’ll spend most of your time using.
Story Adverts
Story adverts appear between Instagram Stories and take over the full screen for a few seconds.
Because people tap through Stories quickly, your message needs to be clear straight away. These adverts work best when you keep them short and simple.
Story adverts are usually more effective when used alongside feed adverts rather than on their own.
Reel Adverts
Reel adverts appear inside the Reels feed and are designed to blend in with organic Reels content.
These work best when the video feels natural to Instagram. Highly polished or corporate-looking videos often perform poorly here. Short, clear videos where someone is speaking directly to camera tend to work better.
Reel adverts can reach a lot of people, but results can vary, so they’re best tested carefully.
Website Click Adverts
Website click adverts send people straight to your website, usually your homepage or a specific page.
You can show these adverts in feeds, Stories, or Reels, depending on how you set them up. How well they work depends heavily on how clear and mobile-friendly your website is.
If your website doesn’t guide visitors clearly, these adverts can drive traffic without generating meaningful enquiries.
Message Adverts
Message adverts invite people to start a conversation with you via Instagram Direct or WhatsApp.
These can work well if you’re set up to respond quickly and consistently. If messages aren’t monitored properly, they can create delays and a poor first impression.
Before using message adverts, make sure your team knows how to handle enquiries that come in this way.
Step-by-step: Getting Started With Instagram Ads (for Dental Clinics)

Step 1: Decide what you want the ads to do
Pick one primary goal to start with. Don’t mix goals in the same first campaign.
- More local awareness (people in your area repeatedly seeing you)
- More website visits (people clicking through to learn more)
- More messages (people starting a conversation in IG or WhatsApp)
Step 2: Start with the right ad types (don’t overcomplicate it)
For most dental clinics, start in this order:
- Feed adverts (via Meta Ads Manager)
This should be your default starting point. It gives you the most control and the cleanest learning. - Story adverts (run alongside feed, not instead of it)
Use Stories as an extra placement once you’ve got a feed ad working. - Reel adverts (only once you have a video that already works organically)
Reels can do well, but results are more variable. Test them once you have proven creative.
Hold off on these initially:
- Boosted posts (easy to waste money; limited control)
- Message adverts (only when you know who replies, how fast, and what the reply flow is)
Step 3: Choose your first creatives (what you actually advertise)
Start with 1–2 pieces of content, not ten. Pick something that already works organically.
Best first choices:
- a dentist-led talking-to-camera explanation (30–60 seconds)
- a myth-busting / clarification video (simple, calm, direct)
- a review-based post (text-based, believable, not exaggerated)
Avoid starting with:
- before-and-after focused creative
- “perfect smile” transformation language
- heavy discount / offer-led posts (often attracts the wrong enquiries)
Step 4: Build a simple campaign structure (keep testing clean)
Start with:
- 1 campaign
- 1 ad set
- 2 ads (same targeting, two different creatives)
This makes it obvious what’s working without muddy data.
Step 5: Set local targeting properly (don’t guess)
- Target your real catchment area (where patients actually travel from)
- Keep targeting broad enough to learn (don’t over-narrow with dozens of interests)
- If you serve a specific patient type (eg implants), reflect that in the creative, not overly complex targeting
Step 6: Pick a sensible starting budget
Start small but meaningful so you get data.
A practical starting range for many clinics is:
- £10–£30/day for the first test week
You can scale once you know which creative and format performs.
Step 7: Run the test for long enough to learn
Don’t switch things off after a day.
Run your first test for 7 days unless performance is clearly broken (eg zero engagement, wrong location, obvious mismatch).
Step 8: Judge performance using the right signals
Early on, don’t obsess over vanity metrics. Look for:
- video watch time / completion rate (if video ads)
- profile visits and website clicks
- message starts (if you’re using message placements)
- and most importantly: quality of enquiries (are they the right patients?)
Step 9: Make one change at a time
After your first week:
- keep what’s working
- replace what isn’t
- change one variable at a time (creative or targeting or format)
If you change everything at once, you won’t know what caused improvement.
Step 10: Add additional ad types only after you have a winner
Once you find a creative that performs:
- add Story placements if you haven’t already
- test Reels using the same creative (or a slightly tighter edit)
- only then consider message adverts if you can respond quickly and consistently
Common Instagram Ad Mistakes Dental Clinics Make (and How to Avoid Them)

Most problems clinics have with Instagram ads aren’t technical. They’re structural mistakes that quietly drain budget without delivering the right enquiries. The points below are the ones we see most often.
- Treating Ads as a Shortcut
Ads don’t fix an unclear profile, weak messaging, or inconsistent content. If someone clicks your ad and lands on a sparse or confusing profile, they leave. Make sure your organic content does its job before amplifying it with paid reach. - Boosting Everything
Boosting posts feels easy, but it’s rarely strategic. When you boost multiple posts without control or testing, you lose visibility on what’s actually working. Use proper campaigns in Ads Manager so you can learn and improve, rather than guessing. - Starting With the Wrong Ad Type
Jumping straight into message ads or complex funnels often backfires. Start with feed adverts promoting clear, educational content. Add other formats only once you know what resonates and how enquiries are handled. - Over-Targeting Too Early
Narrow targeting feels precise, but it often starves campaigns of data. Keep targeting reasonably broad at the start and let the creative do the filtering. If the message is right, the right patients respond. - Using Before-and-After Creative Carelessly
Before-and-after content can create issues, especially if it implies guaranteed results or unrealistic outcomes. This can limit ad approval or create compliance problems later. If you use results-based content, always add context and keep expectations grounded. - Changing Too Many Things at Once
Switching creative, targeting, budgets, and formats all at the same time makes it impossible to know what worked. Change one variable at a time so improvements are intentional, not accidental. - Judging Ads Too Quickly
Stopping ads after a day or two usually leads to false conclusions. Give campaigns time to gather data. Unless something is clearly broken, run tests for at least a full week before deciding. - Focusing on Clicks Instead of Enquiries
High clicks don’t always mean good results. Pay attention to the quality of enquiries coming in. A quieter campaign that attracts the right patients is more valuable than high-volume traffic with no intent. - Forgetting the Follow-Up Experience
Ads don’t end at the click. If calls go unanswered or messages sit unread, the ad spend is wasted. Make sure whoever handles enquiries knows what the ads are promoting and how to respond.
How to Think About Instagram Ad Budgets (With Realistic Figures)

Instagram ad budgets only make sense when you separate testing, stabilising, and scaling. Most clinics struggle because they jump straight to scaling without knowing what actually works.
Phase 1: Testing Budgets (Weeks 1–2)
Your first spend is about learning, not “getting patients”.
Typical test ranges for dental clinics:
- £10–£20 per day – very light testing (slow learning)
- £20–£30 per day – sensible baseline for most clinics
- £40–£50 per day – faster learning if you have capacity and good content
Run one campaign only, ideally with:
- 1 audience
- 2 creatives
- 7–14 days runtime
Weekly test spend examples:
- £20/day → ~£140 per week
- £30/day → ~£210 per week
- £50/day → ~£350 per week
Below £10/day, data is usually unreliable. Above £50/day, you should already have strong creative and processes in place.
Phase 2: Stabilising Budgets (Once You See Signals)
Once you start seeing:
- repeat profile visits
- consistent video engagement
- enquiries that match your treatments
you move into stabilisation rather than constant testing.
Common stabilised budgets:
- £30–£60 per day for a single, well-performing campaign
- £900–£1,800 per month total ad spend
At this stage, you’re not changing things daily. You’re letting campaigns run and only adjusting when patterns emerge.
Phase 3: Scaling Budgets (Only After Proof)
Scaling should happen only when:
- enquiry quality is good
- response times are under control
- the clinic can absorb more demand
Typical scaling ranges we see:
- £60–£100 per day for established campaigns
- £1,800–£3,000 per month for clinics using ads consistently
Some larger clinics spend more, but only when ads are fully integrated into wider marketing and enquiry handling.
Jumping to these figures without proof usually leads to wasted spend.
Cost Expectations (What Clinics Often Ask)
To keep expectations grounded:
- Instagram ads rarely deliver predictable cost-per-patient from day one
- Cost per enquiry can fluctuate significantly week to week
- Lower spend = higher variability
What matters early on is quality and consistency, not chasing a specific cost number.
Match Spend to Your Capacity
If your clinic can comfortably handle:
- 5–10 additional enquiries per week → keep budgets modest
- 10–20 additional enquiries per week → moderate scaling works
- more than that → only scale if systems and diaries can cope
Spending more than your clinic can handle often leads to missed calls, slow responses, and poor patient experience.
Think Monthly, Review Weekly
Avoid daily budget tweaks. Instead:
- review performance weekly
- adjust budgets gradually
- scale in steps, not jumps
Steady increases almost always outperform aggressive scaling.
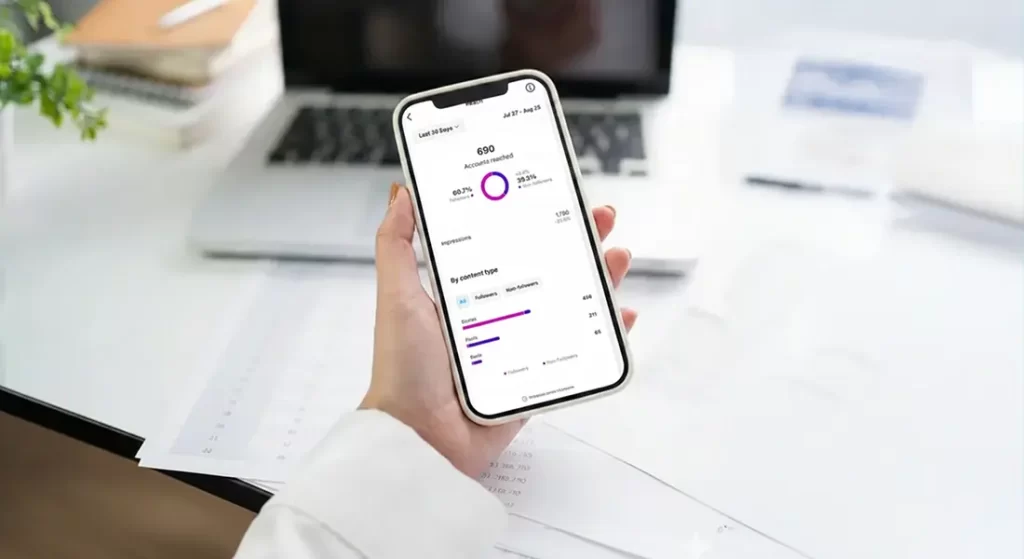
How to Measure Whether Instagram Is Actually Driving Bookings
The only reason Instagram matters to your clinic is if it helps you generate enquiries and bookings. Likes, views, and followers can look reassuring, but they don’t pay the bills.
When you measure Instagram properly, you’re not asking “is this post popular?” — you’re asking “is this bringing the right patients into the clinic?”
Start With Enquiries, Not Engagement
Your first point of measurement should always be leads. That includes:
- phone calls that mention Instagram
- direct messages
- website enquiries that come from Instagram
- bookings where patients say they’ve seen you on Instagram
If Instagram isn’t contributing to enquiries, nothing else really matters.
Track Where Bookings Actually Come From
You don’t need perfect tracking to do this well. You just need consistency.
Simple ways you can track Instagram’s impact include:
- asking new patients how they found you
- tagging Instagram enquiries in your booking system
- using a dedicated enquiry form or link for Instagram traffic
Over time, patterns become obvious. You’ll see whether Instagram is influencing real bookings or just traffic.
Measure Booking Quality, Not Just Volume
Ten enquiries that don’t convert are less valuable than two that do. Pay attention to:
- whether Instagram leads match your core treatments
- how informed patients are when they contact you
- whether they’re booking consultations, not just asking for prices
If Instagram is working properly, patients arrive more educated and more confident.
Look at Net Bookings, Not Raw Leads
Don’t stop at lead numbers. Track how many of those leads actually turn into booked appointments.
Instagram should improve:
- your consultation booking rate
- the quality of conversations
- how prepared patients are when they arrive
If you’re seeing leads but no bookings, the issue is usually messaging or follow-up — not the platform itself.
Review Performance Weekly, Not Daily
Daily numbers fluctuate too much to be meaningful. Instead, review:
- leads per week
- bookings per week
- conversion trends over time
This stops you making reactive decisions based on noise.
Understand Instagram’s Real Role
Instagram often works as a support channel rather than a direct booking machine. Patients may:
- see your content weeks before enquiring
- recognise your clinic when they search later
- feel more confident booking because they’ve seen you repeatedly
If patients mention Instagram during calls or consultations, it’s doing its job — even if the final booking didn’t come from a direct click.
Know When to Adjust (and When to Hold Steady)
You should adjust when you consistently see:
- enquiries that don’t fit your services
- low booking conversion from Instagram leads
- confusion about what you offer
Avoid changing things based on:
- one quiet week
- one strong post
- short-term fluctuations
Measurement is about spotting trends, not chasing perfection.
Instagram Marketing for Dentists: FAQs
1. How long does it usually take before Instagram starts generating enquiries?
Instagram rarely delivers instant results. Most clinics start seeing meaningful enquiries after 4–8 weeks of consistent posting, once patients have seen your content multiple times and recognise your clinic.
2. Do you need to post daily for Instagram to work?
Daily posting works well, but it’s not mandatory. What matters more is consistency. If you can post daily using a clear structure, great. If not, posting 3–5 times per week in a predictable rhythm can still deliver results.
3. Should dentists be on camera themselves?
Yes, in most cases. Dentist-led content builds trust faster than graphics or stock videos. Patients want to see who they’re trusting with their treatment, even if the videos are simple and informal.
4. Is it better to focus on Reels, posts, or Stories?
Reels and feed posts should form the core of your strategy. Stories are useful for informal updates but shouldn’t replace structured content. Start with feed posts and Reels before worrying about Stories.
5. Can Instagram actually generate high-quality patients, not just price enquiries?
Yes, when done properly. Educational, dentist-led content tends to attract patients who are more informed and more likely to book consultations, rather than just asking for prices.
6. Should you run Instagram ads straight away?
No. Ads work best once your profile looks credible and consistent. If someone clicks an ad and sees an empty or unclear profile, they’re unlikely to enquire. Get your organic content right first, then layer ads on top.
7. What type of Instagram ads should you start with?
Most clinics should start with feed ads via Meta Ads Manager, promoting educational content. Story and Reel placements can be added later. Avoid complex message ads until you know how enquiries will be handled.
8. Are before-and-after posts allowed on Instagram?
Organically, they can be used carefully with context. For ads, before-and-after content can create approval issues, especially if it implies guaranteed or unrealistic outcomes. Use them cautiously and never as your main ad creative.
9. How much should a dental clinic realistically spend on Instagram ads?
Most clinics start testing between £20–£50 per day. Lower budgets often don’t generate enough data to learn from. Budgets should increase only once you see consistent, good-quality enquiries.
10. What’s the best way to measure whether Instagram is working?
Focus on leads and net bookings, not likes or followers. Track how many enquiries mention Instagram and how many of those turn into booked consultations. Over time, this tells you far more than platform metrics.
Final Thoughts

Instagram doesn’t work for dental clinics when it’s treated as a side project or something you post on occasionally. It works when you approach it with structure, clarity, and consistency — the same way you approach patient care.
You don’t need to chase trends, go viral, or turn your clinic into a content studio. What matters is showing up regularly, explaining what you do clearly, and making it easy for the right patients to feel confident about contacting you.
When your content is dentist-led, your posting is consistent, and your ads are used deliberately rather than impulsively, Instagram becomes a reliable support for your wider marketing — not a distraction.
If you’re measuring the right things, focusing on leads and net bookings rather than vanity metrics, you’ll know what’s working and where to improve. From there, growth becomes predictable rather than guesswork.
And if managing Instagram, social media, and digital marketing alongside running a clinic feels like too much, you don’t have to do it alone. You can contact our dental marketing agency, Clinic Engine, for expert help managing your Instagram, social media, and wider digital campaigns end to end. We have over a decade of experience working with dental clinics and use battle-tested strategies designed to deliver high-value bookings consistently — without noise, gimmicks, or wasted spend.
If you want Instagram to work as part of a bigger, joined-up growth system, that’s exactly what we’re here to help with.